Managing and Scheduling Website Backups
Overview
Ensuring the safety of your website data is critical. The control panel provides flexible and automated backup options to help protect your websites from data loss. You can schedule daily, weekly, or monthly backups and define a retention period to manage how long the backups should be preserved.
Backups can be stored locally or on remote storage providers such as Amazon S3, Google Drive, OneDrive, and SFTP (via Rclone), ensuring better redundancy and disaster recovery.
Scope
This guide covers the complete backup management process including:
- Configuring backup types and settings
- Scheduling automatic backups
- Managing disk space for backups
- Setting retention policies
- Viewing and managing existing backups
- Accessing remote backup options
Prerequisites
- Access to the cPGuard X control panel with administrative privileges
- Sufficient disk space for storing backups
- Websites created within the control panel
Steps / Usage
Step 1: Configure Backup Settings
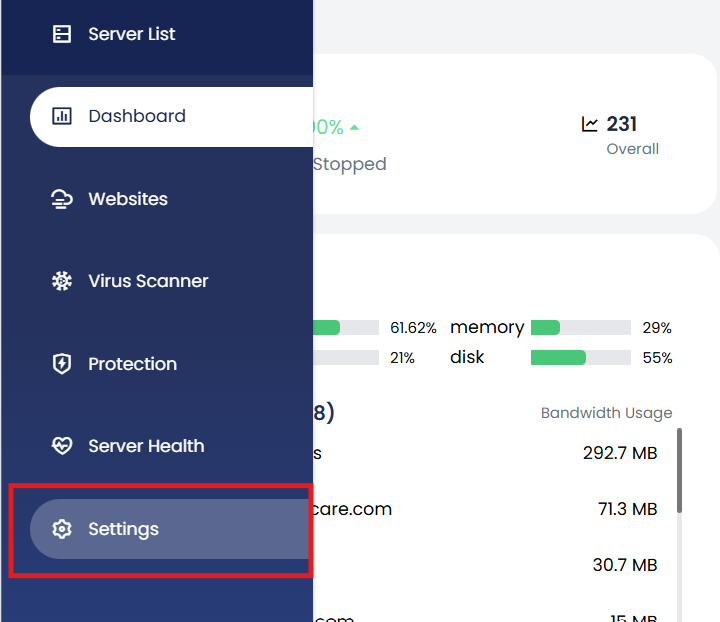
- Login to your control panel and navigate to Settings.
- Click on Backup under the Settings section.
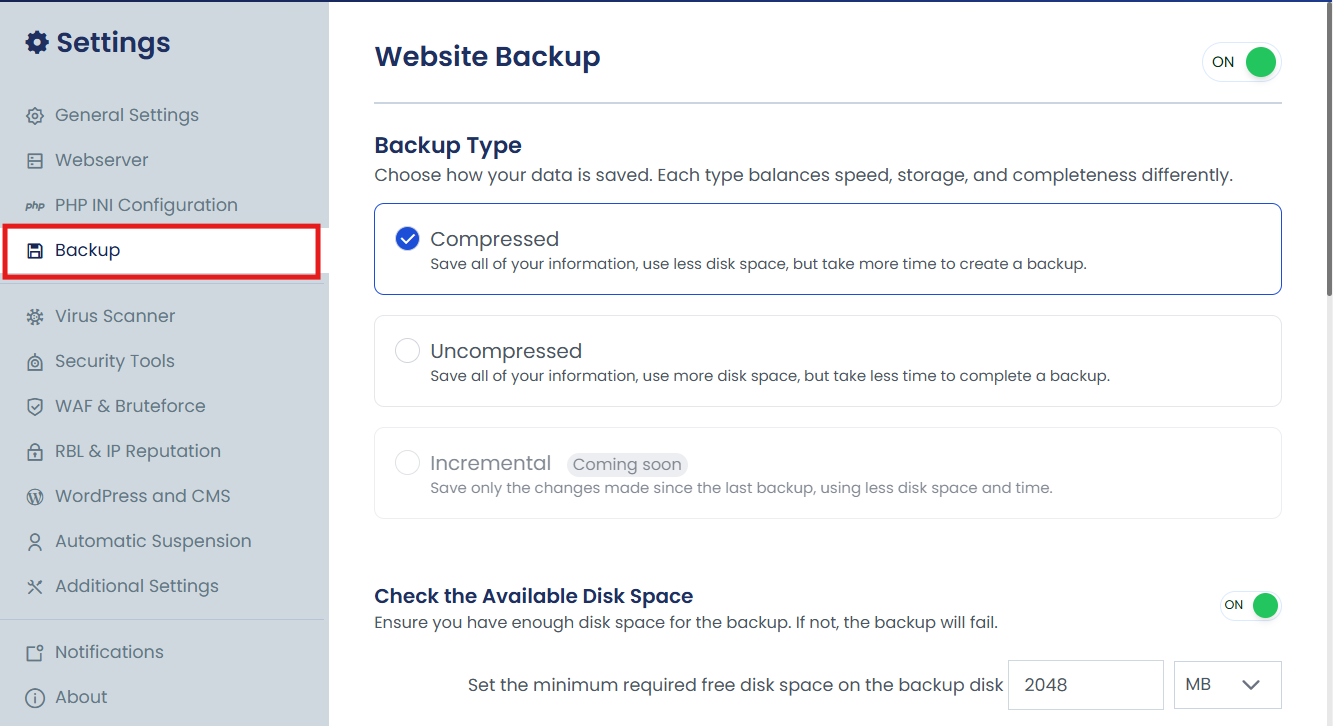
- Here, you can configure:
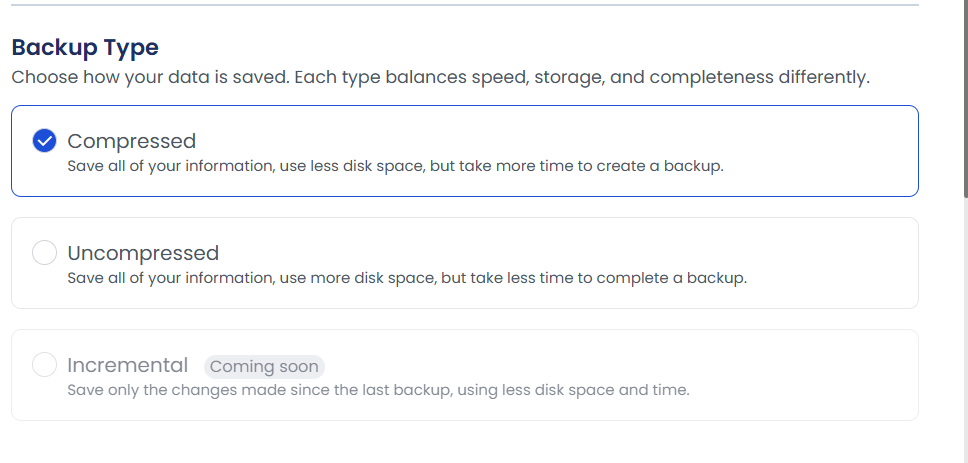
- Backup Type: Select whether you want the backups to be stored in compressed or uncompressed format.
Step 2: Enable Disk Space Management
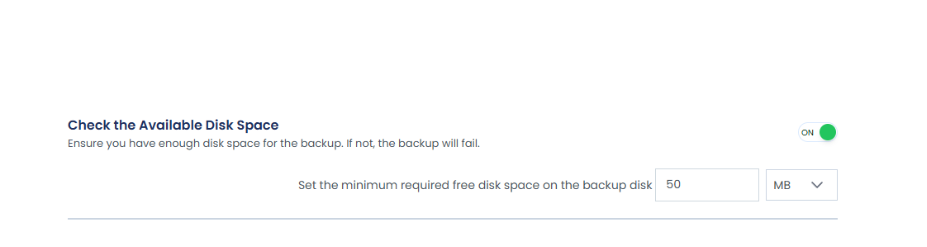
Before initiating a backup, ensure that there is enough free disk space. Insufficient space will cause the backup to fail. You can:
- Enable Disk Space Check using a toggle in the settings.
- Set a Minimum Free Disk Space Threshold to ensure successful backups.
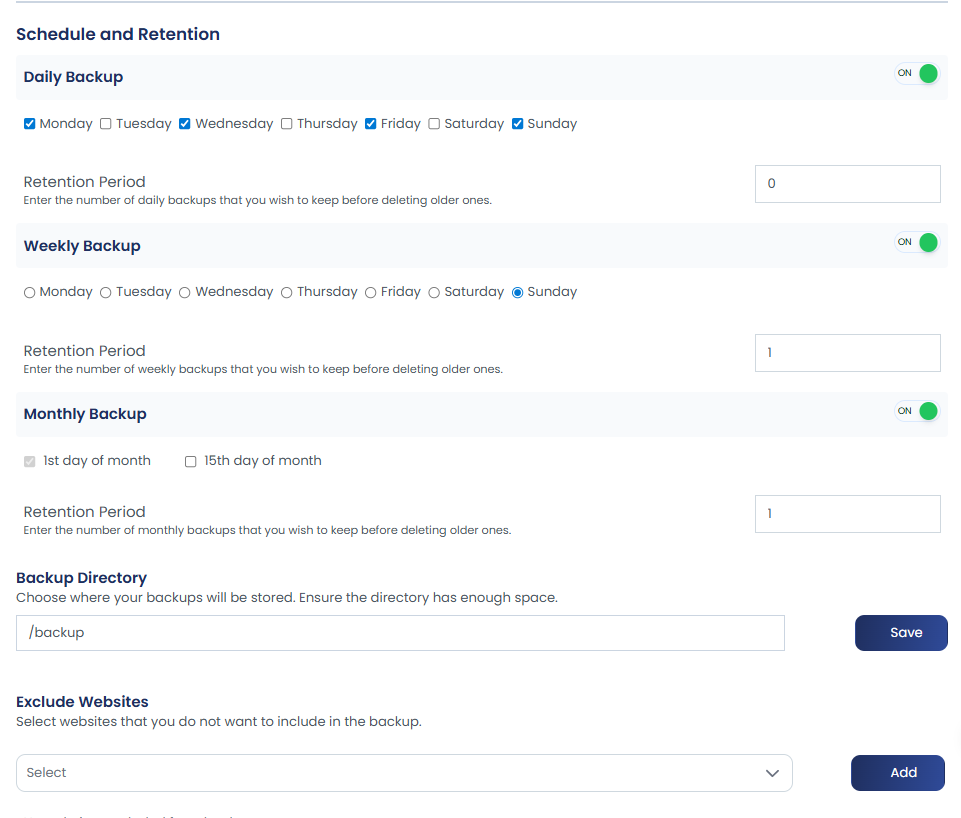
Step 3: Set Backup Schedule and Retention
Configure the backup schedule and retention settings:
- Backup Frequency: Choose between daily, weekly, or monthly backups.
- Retention Period: Specify how many days or backup copies you want to retain.
Step 4: Configure Backup Storage
Additional configuration options include:
- Backup Storage Location: By default, backups are saved in the
backupdirectory. You can change this location based on your preference. - Exclude Specific Websites: If there are websites you do not want to include in the backup, you can exclude them. By default, all websites will be backed up.
Step 5: View and Manage Backups
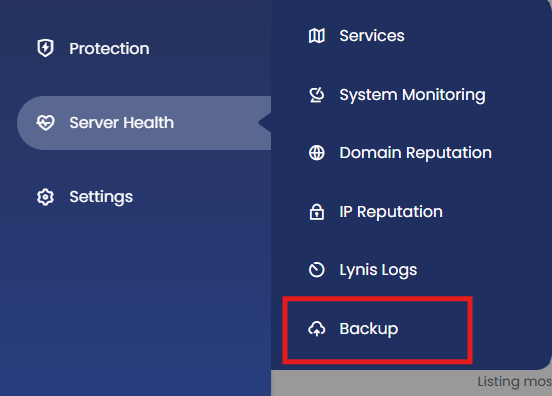
Once backups are created, you can view them by going to Server Health > Backup in the control panel.
From here, you'll be able to see:
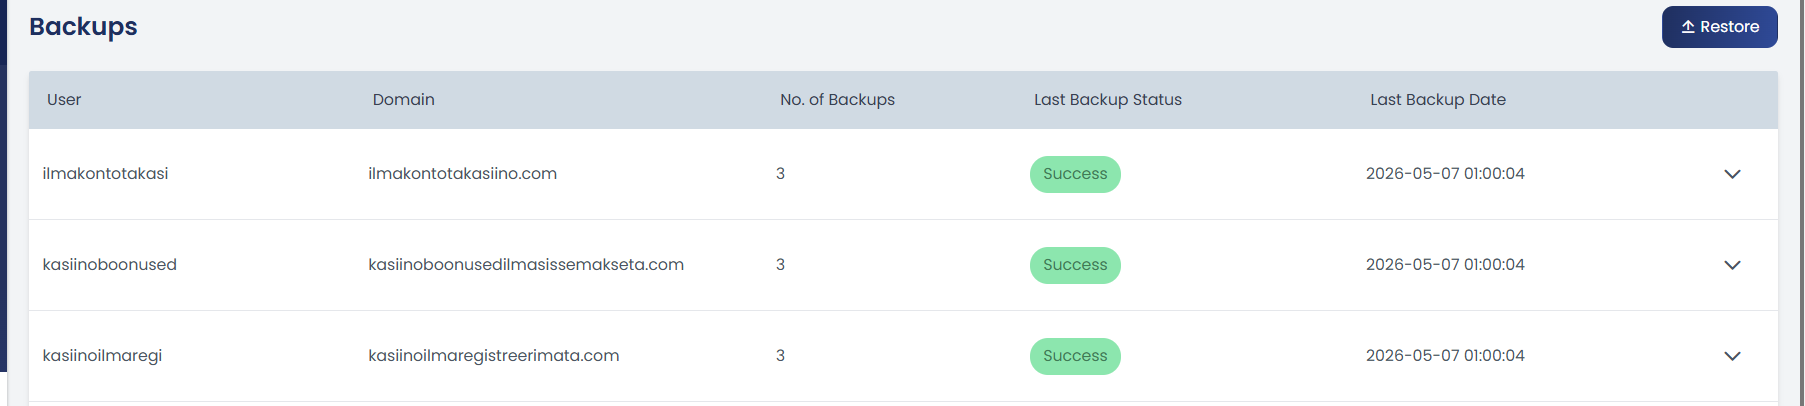
- The number of available backups
- Last backup date
- Backup size
- Duration and other details
The dropdown menu will display options such as:
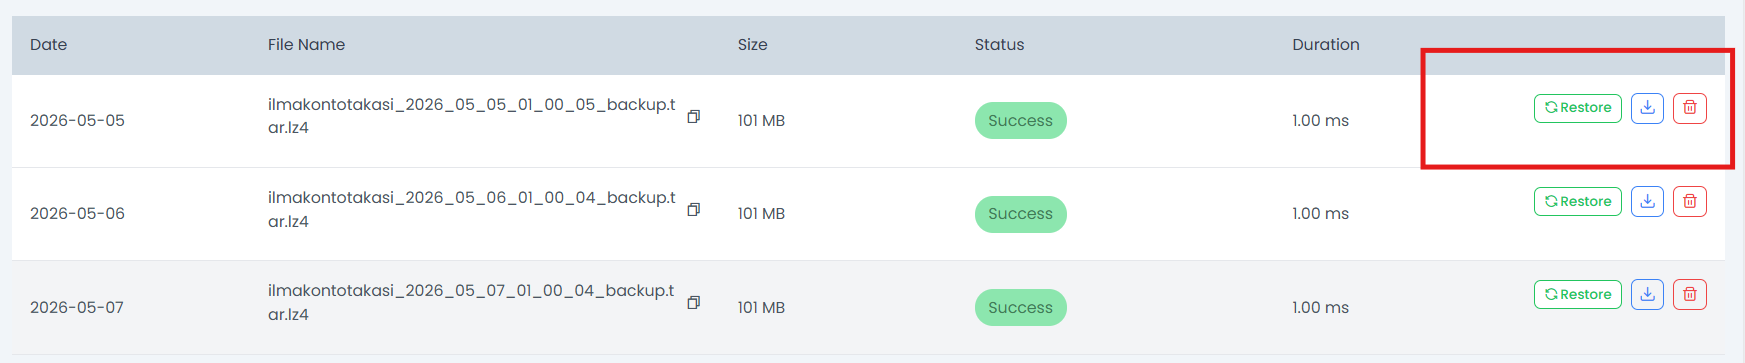
- Restore: Restore a backup to your website
- Download: Download backup to local machine
- Delete: Remove a backup
Step 6: Configure Remote Backups
You can configure remote backups to securely store your data on supported destinations. This provides an extra layer of security by storing backups off-site.
For detailed instructions on setting up remote backups, please refer to the Remote Destinations guide.
Notes / Defaults
- Default Backup Location: Backups are stored in the
backupdirectory by default. - Default Backup Scope: All websites are included in backups by default unless explicitly excluded.
- Backup Formats: Both compressed and uncompressed formats are supported based on your preference.
- Retention: You can define retention periods in days or by number of backup copies.
- Remote Storage: Integration with multiple cloud providers ensures flexibility in backup storage strategy.
- Last Updated: August 2025
Troubleshooting
Backup Fails Due to Insufficient Disk Space
- Solution: Enable the disk space check and set an appropriate minimum free disk space threshold to prevent this issue.
- Verify that your server has adequate storage capacity before initiating backups.
Cannot Find Backup in View Backups Section
- Solution: Navigate to Server Health > Backup to view all available backups.
- Ensure backups have been created by checking the backup schedule settings.